Saturday, November 12, 2011

 Making Apple Cider with friends.


First we had to cut the apples with a huge knife. Ray really liked that part.

Then we had to feed the cut apples into a grinder/masher while someone kept pressing them through the grinder.

The mashed up apples were dumped into a press and squeezed through a screen.

The apple pulp is then removed to feed deer or compost.

We poured them into jugs to take home.

A neighbor that was helping brought over some of his hard cider. I think it tasted like white wine.

Wednesday, July 6, 2011

Toilet Paper Tube Binoculars

I made these simple binoculars to sell as an inexpensive impulse item at Kira's craft show that she had on Monday. I only made 3 pairs and was selling them for $1 each, and I sold them all!

I'm ready with my new binoculars! Looking for... sweater monsters! I heard there are some living in the Lyndonville area...


Materials & tools:
  • colored duct tape (I used green, but there are all sorts of cool colors and patterns offered nowadays! You can find colored duct tape in most craft stores. I saw some military camouflage patterned tape the other day that I think would be great! )
  • 2 toilet paper rolls
  • ribbon
  • hole punch
It's super easy! Just wrap the duct tape around the toilet paper rolls to cover the outside of each tube, then tape the two rolls together. Use a hole punch to punch a hole in each side and tie the ribbon onto the tubes. Voila! A quick and fast pair of toy Binoculars for your little explorers! This would be a great craft to accompany teaching little ones nature themed topics...like safari or bird watching!

"Oooooo I see something..."


I see adventure!..... a leopard...or wait...a cheetah! Shhhhh you will disturb it! Wait, what is a cheetah doing in my living room? :)

Tuesday, July 5, 2011

Burger Cookies


I always used to bring these "Burger Cookies" to parties and they were always a hit! I made some this week to bring to my daughter's friends' house for 4th of July. These would be a cute addition to any summer party!

(shown with flip flop cookies)

BURGER COOKIE Ingredients:
  • Vanilla wafers,
  • Peppermint Patties
  • Shredded Coconut
  • Frosting
  • Food coloring. (green to color the coconut/lettuce, and yellow for frosting/mustard)

Place a few drops of liquid green food coloring into a bowl of shredded coconut. also color some frosting to look like mustard or ketchup. I prefer mustard it is prettier and easier to get a good color. (Red just turns pink.)
Unwrap the peppermint patties and place on vanilla wafer. Vanilla wafer is bottom side up. Place on a microwavable tray.

Here is the tricky part.... microwave just so they "START" to melt so they are soften enough to press together. you can tell by how shiney they are. My microwave, I used 20 seconds.

Sprinkle green coconut on the warm wafers.

Use a little yellow frosting to top off the burger.

You can leave the top plain if you like. I put a "Secret topping" on for the bun. I used to use seseme seeds on top but after having diverticulitis I don't use seeds....just in case someone can't have them (like I used to not be able to have before my surgery. Sesame seeds are on EVERYTHING! It's very frustrating!).

I think I first saw these pictured in a magazine YEARS ago (like, back in the 80's) and I have tweaked the process a bit to make them better. Like the microwaving them to melt them a little and colored frosting to help "glue" them together too. When I worked at the McConnell Air Force Base Hospital in Kansas, I was once asked by a Drug Rep to make them for a conference she was having on Cholestorol. She served them to everyone. It was a huge batch...I think I made more than a 100 of them and she paid me very well for it. Hey, look!...I guess I can add "caterer" to my resume! LOL!

Yum! :)
Hope you all had a Happy 4th of July! God Bless!

Friday, July 1, 2011

Flip Flop Cookies!

These are Flip Flop Cookies I made last summer for the BOCES classroom I worked in as an aide. They'd be great for a child's summer birthday party. If you frosted them with red, white, and blue, they would also be good for a 4th of July picnic!

Ingredients:
  • Vienna Cookies
  • Frosting
  • Food Coloring
  • Gummie worms
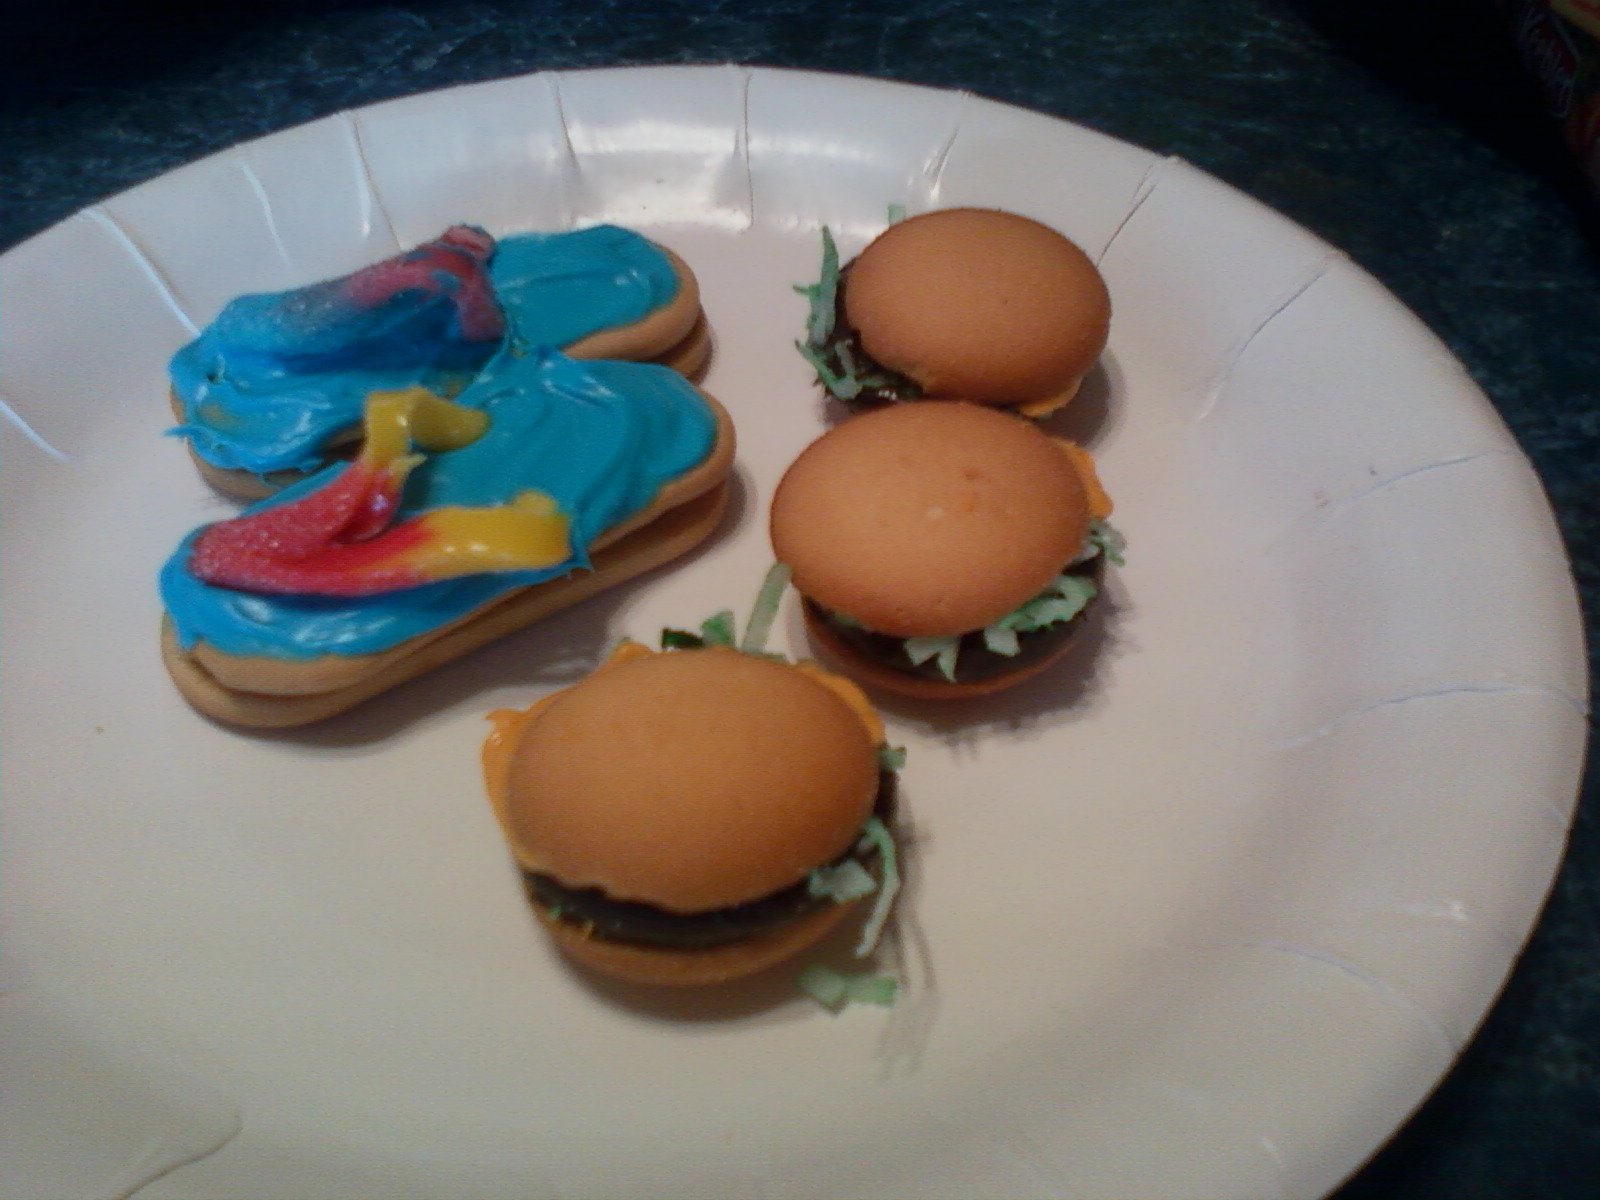
Note about ingredients: The bulk section gummie worms are better than the pre-packaged ones. They are thicker and hold their shape better. Also, the regular white canned frosting is better than the "fluffy" canned frosting. Fluffy kind is not stiff enough to hold the gummie worms up.

Split gummy worms down the center (Pampered Chef kitchen scissors are a wonderful tool!) Kitchen shears work best, but carefully using a sharp knife may work as well. (Be sure not to split it completely in half! It still needs to be together at one end!)

Color your white frosting by mixing in food coloring. (I chose blue.)

Frost the top of a Vienna Cookie with the colored frosting. Then place the gummie worm on the frosted cookie and arrange to look like flip flop straps. The frosting should act as "glue" to stick it on. Repeat for the second "flip flop".

You are "supposed" to serve the cookies on graham cracker crumbs so it looks like "sand". (Waste of good graham crackers I thought though!)


Enjoy!

Saturday, June 25, 2011

Recycled Coffee Cup Post-It Notepads

Here's a tutorial for an optional way to make my Post-It Notepads , using recycled coffee cups to make the covers instead of cardstock!


I love creative ways of making new things out of materials that would have otherwise been thrown away!

Materials & Tools:
  • Coffee cup
  • tissue paper (napkins with pretty patterns/colors work too)
  • Diamond Glaze glue
  • Post-It notes
  • Rubber stamps, paper, or other art/papercraft supplies to decorate
  • Bleach (to disinfect & clean coffee cup)
  • Scissors or paper cutter
  • Iron & ironing board
  • Ruler
  • Folding tool *optional
  • Sanding block (to "distress") *optional

Soak the cups with a little bleach and water overnight. This cleans the inside of the cup and helps break down the glue too.

Take the cup apart and flatten it. Use an iron to melt the wax coating inside the coffee cup to stick the tissue paper to the inside of the cup.

Trace a rectangle (7 1/8 inches by 3 1/4 inches.) over the cup's printed surface to make a pretty cover. Then cut it out.

Make creases at 3 1/2 and 3 6/8. This is where the folds will be. (I know... It's a Martha Stewart tool. I caved and bought it.... but with a 50% coupon!)

Decorate the book...inside or out with what ever you want! (I like to use rubber stamps!)

Run a small amount of Diamond Glaze glue along the fold line to glue in the Post-it notes.

I use a sanding block to distress the edges to give it more character.

And there you have it! A post it notebook made using your coffee cup!

You can make lots of these in a short amount of time. These are all the Post-it note book covers I made on my first day off this summer! I just love to make these and I usually give them away, but I am going to try to sell some at my daughter's craft show booth in Lyndonville on the 4th of July!

I'v started collecting coffee cups to make these. Some cups work better than others. Obviously paper cups work much better than styrofoam based ones (and I haven't even tried tackling plastic based ones!). I particularly like Starbucks and Tim Horton's cups. If you're at a coffee shop in the Rochester area and some lady asks you for your coffee cup, it may just be me!

Happy crafting!

Tuesday, May 10, 2011

Post-It Notepads (extended tutorial)

Here is a cleaned up and extended tutorial for my Post-It Notepads...

Step 1:
First cut your base card stock 7 1/8 inches by 3 1/4 inches. (I used black...since a friend, who was destashing her scrapbooking supplies, gave me a lot of this thick, sturdy, black cardstock.) Crease at 3 1/2 and 3 6/8. (See picture above.)

Step 2:
Create Flowers or circles from punches or what ever design you want. You can even use rubber stamps, markers, geometric shapes, whatever you want! (This is the fun and creative part!)

Step 3:
Glue a 3 by 3 piece of paper on top of the black cardstock (I used lime green), then glue on your embellishment (I used green & yellow paper flowers).


Step 4 (Optional):
If you want your inside cover to be a pretty pattern or a different color from the base cardstock, you can glue some patterned/colored paper on the inside of the cardstock cover.


Step 5:
Finally, glue the spine of the 3 inch Post-It Note pad into the area where you creased for the folds. (OR, alternatively, you could glue the pad to the bottom of the inside of the booklet, but I recommend gluing the spine.)


And there you have it! A cute little Post-It NoteBook to pretty up your regular old boring Post-Its! You can make lots of them with different designs. You can even personalize them. It's a quick and easy project and can be a great little handmade gift!

Monday, May 9, 2011

Post it Note Pads

First cut your base card stock 7 1/8 inches by 3 1/4 inches. I used Black.
crease at 3 1/2 and 3 6/8. See picture above.


Create Flowers or circles from punches or what ever design you want. You can even use rubber stamps, markers, geometric shapes. That is the creative part.


I glued a 3 by 3 piece of lime green on top of the black, then glued on the flowers on. I then glue the spine of the 3 inch Post-it notes into the area where I creased for the folds. OR you could glue the pad to the bottom of the inside of the booklet.


Did I mention I hate blogging. I don't even know why I started this. I don't know how to manipulate the pictures or text. So.... there you go, Kira. This is my POST-IT note tutorial. :P

Friday, March 4, 2011

Kira's Crafty Life Blog: Squarc the Sweater Gremlin

Kira's Crafty Life Blog: Squarc the Sweater Gremlin: "I'm finally back to making some monsters! I've been lining up craft shows for the Spring and realized that I need to build up my inventory ..."

Thursday, March 3, 2011

Fun Cardmaking with a used coffee cup.

I always want to save my coffee cup to make cards and little books out of them. It seems I never really take the time to make them. Sunday afternoon I went to a friend's house to "play". I brought my cups and came up with this design. It started out as a Panera Bread cup. I thought it was unique because the logo was centered on one side of the cup opposite the seam. So I made a Tri folded card. After making sure it was clean and dry I split the seam and put coffee themed tissue paper on the inside and ironed it so the waxy inner coating glued the tissue paper to the inside.  

<><><><><><>
<><>
<><><><><><><><>
I used Alcohol inks to make tabs for closures. I used teal colord brads to attach the tabs.


I wanted to send this card to a friend who has moved away and I miss seeing her. So I was thinking of having coffee WITH HER. I used a rubber stamp to decorate the coffee pot on the inside and made a pocket for the packet of instant Starbuck's coffee (VIA) in the card. Stamped the pocket with a black ink that says "Let's have Coffee" then tucked the packet into the pocket.  I felt the need to tie in the Starbucks Coffee logo because I was sending Starbuck's coffee with the card so I cut out logos from other cups and glued them on and also decorated the card with more stamps and even used puff paint to look like foam.